
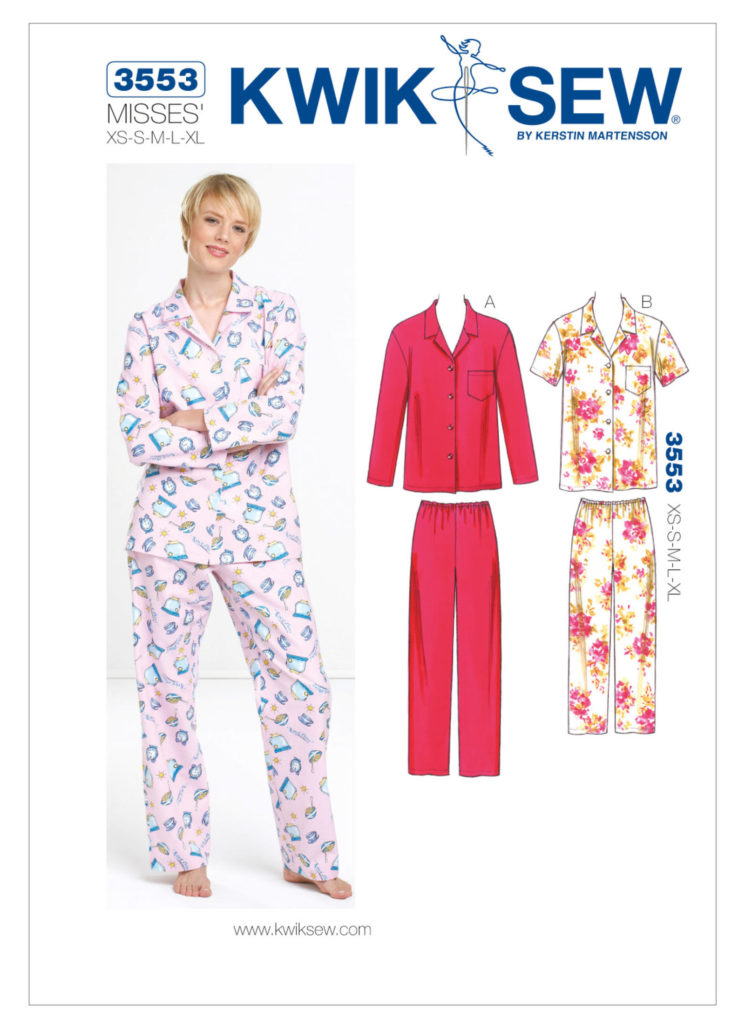
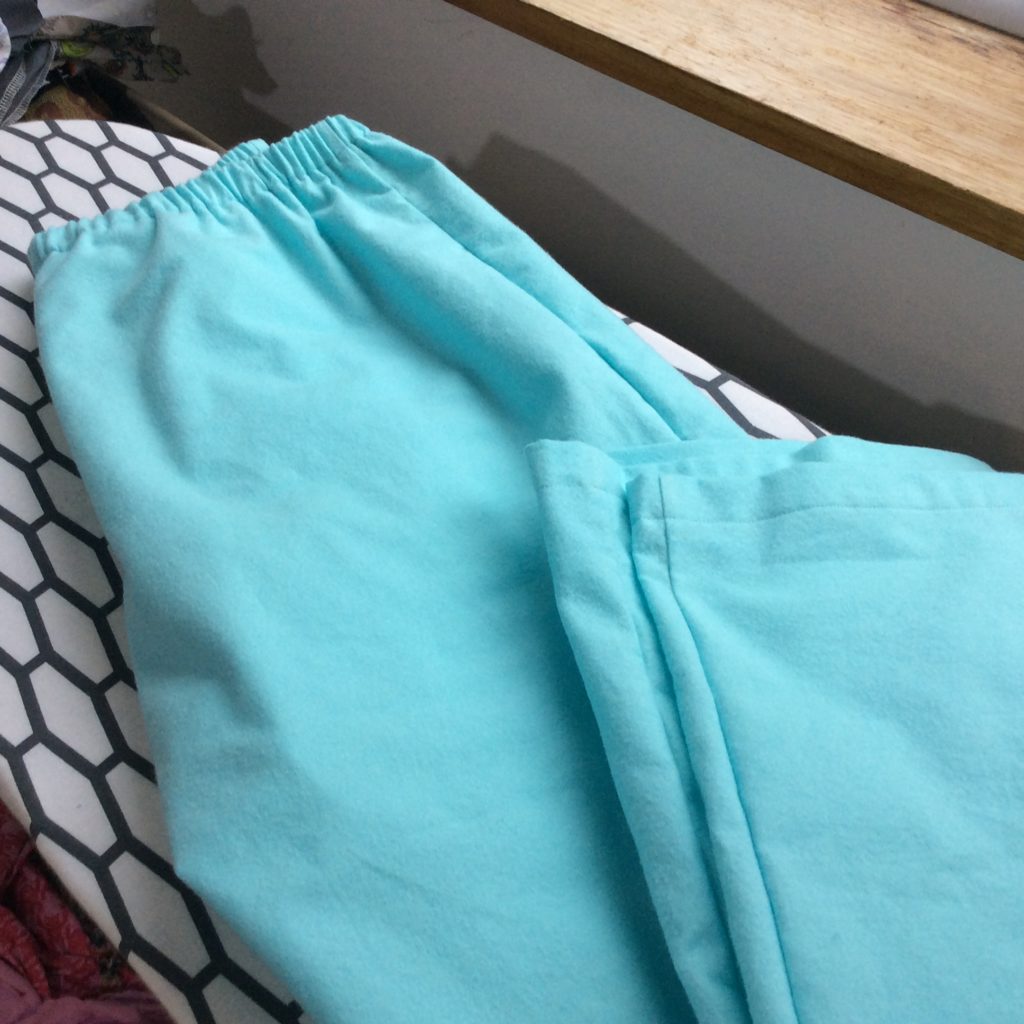
Kwik Sew 3553* is an easy to sew pyjama set in two versions: long sleeved with full length bottoms or short sleeved with cropped bottoms. The shirt has a front button-down closure, notched collar and chest pocket and the bottoms are pull-on pants with elastic in a casing at the waist.
I chose this pattern over Simplicity 1504*, which I also own, as I wanted a quick sew with no extras like piping or cuffs and also because I wanted a pattern that wasn’t unisex. I made view A, the long sleeved, full length version.
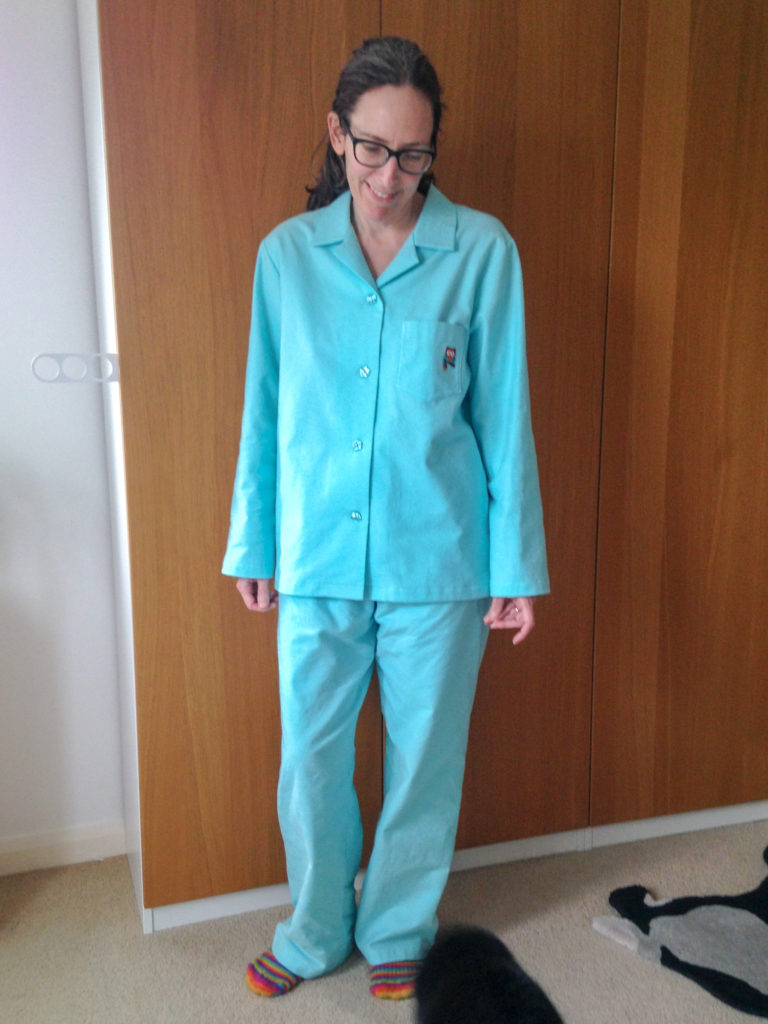
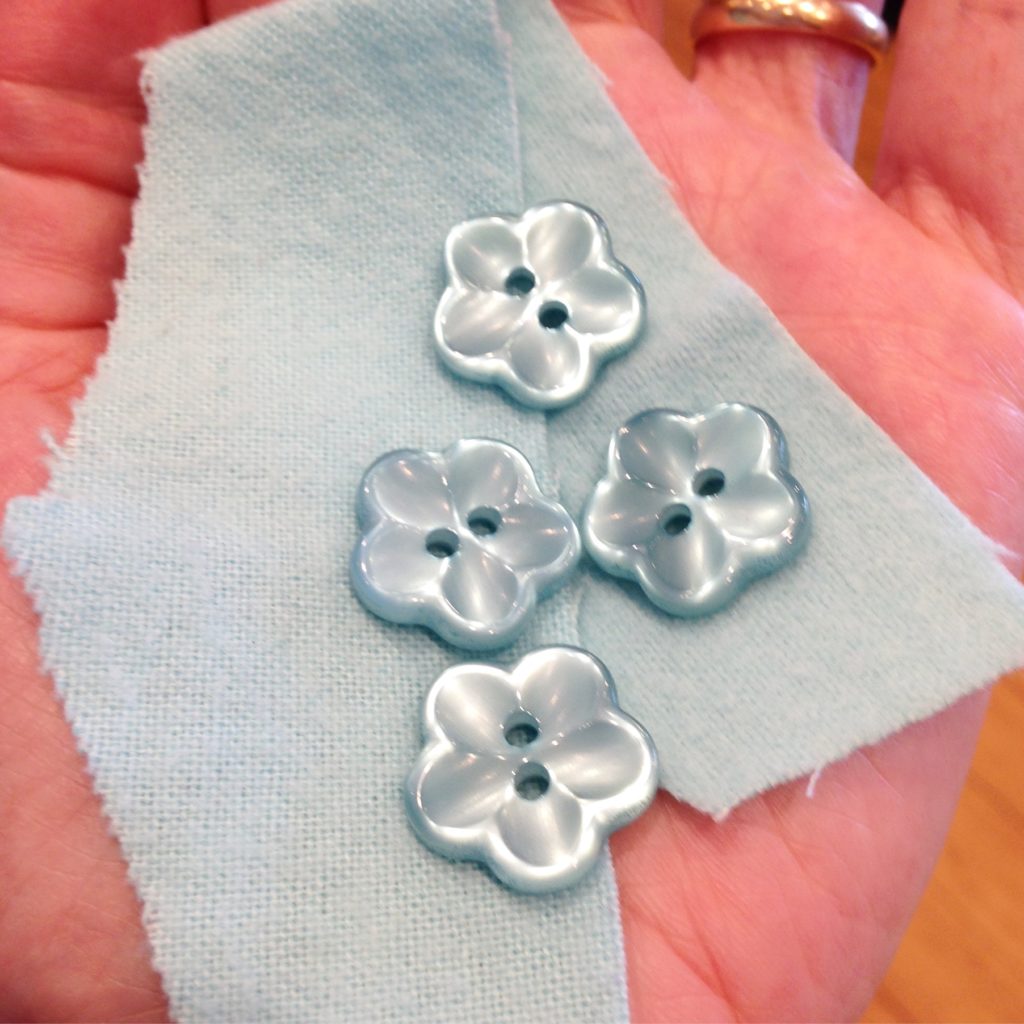
When my favourite organic fabric shop closed down I managed to grab a 4.5m bolt end of beautiful pale blue brushed 100% organic cotton (flannel) from Cloud9 Fabrics. I just knew it had to be pyjamas and what better time than the middle of winter to make a pair of cosy flannel pjs? Suggested fabrics for this pattern also include cotton, cotton types, broadcloth, chambray, silk, and silk types. I’m tempted to make a satin or short summer pair next! I also used elastic from my stash and these cute flower buttons from John Lewis*.
As this is a Kwik Sew pattern the pattern comes in just five sizes: XS, S, M, L and XL. I made the M (Bust: 37″-38 1/2″, Waist: 27 1/2″-29″, Hip: 38 1/2″ -40″) for both top and bottom as I wanted a fairly generous fit (my measurements are 33″/28″/38″). I also took one look at the cover model and decided to lengthen the arms and legs by 1″ although of course the model is probably a giraffe and I’m a standard 5’5″. My pet hate about ready-to-wear pjs is that the arms and legs are ALWAYS too short despite me often sizing up to an XL. I have no regrets!
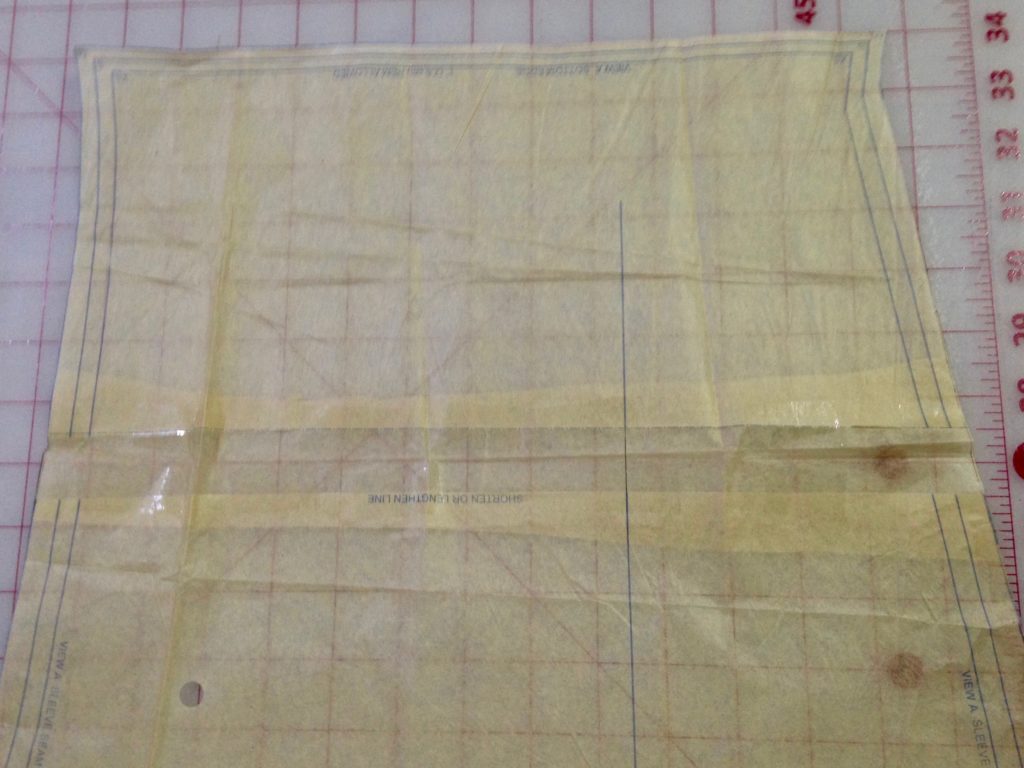
I lengthened the arms and legs by cutting on the “shorten or lengthen line” and then spreading the pieces apart by 1”. I then added spare tissue behind the gap and “trued” up the pattern pieces so that the lines were all smooth.
I was happy with the fit I achieved. The sizing is generous in the top although I found the bottoms not that generous in the booty. This was slightly exacerbated by my decision to fold over the waist casing a little over 2.5cm instead of 2cm. I made this decision because I didn’t like the idea of using 1cm elastic and I also didn’t have any! I used 2cm wide elastic instead. After sewing the casing and threading the elastic through I looked at the pattern instructions and realised that that isn’t actually the way you’re told to do it! I like it better this way though, as it means I was able to try on the bottoms and adjust the elastic to my taste before joining the elastic ends and sewing up the hole in the casing. I didn’t bother to anchor the elastic as per the instructions as the wider elastic didn’t seen inclined to twist.
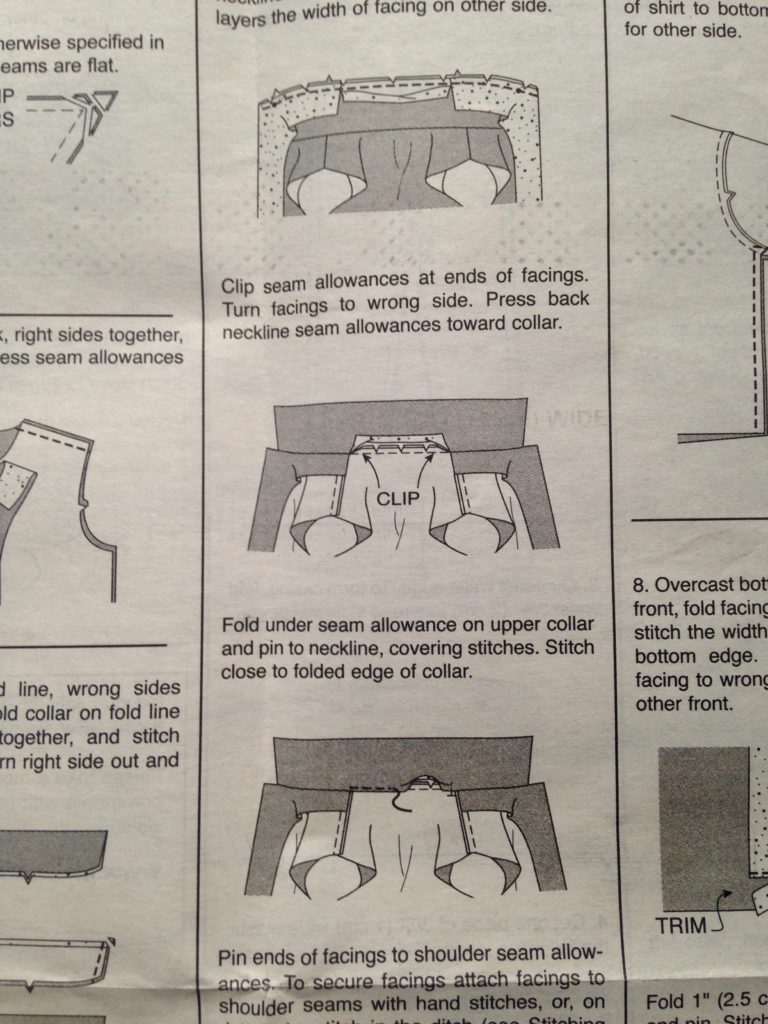
I found the instructions clear and easy to follow and the yardage quoted also turned out accurate. I was a little surprised that the collar facing was sewn down with visible stitching on the inside but I checked against my ready-to-wear pjs (and the above mentioned Simplicity pattern) and they were done the same way. I would still like to find a better finish – perhaps a front facing that extends across the back like in the Jalie pjs? I chose to attach the facings at the shoulders by “stitching in the ditch” (poorly) and enjoyed that far more than hand sewing them down. If I’d done it well, the stitches would have been invisible.
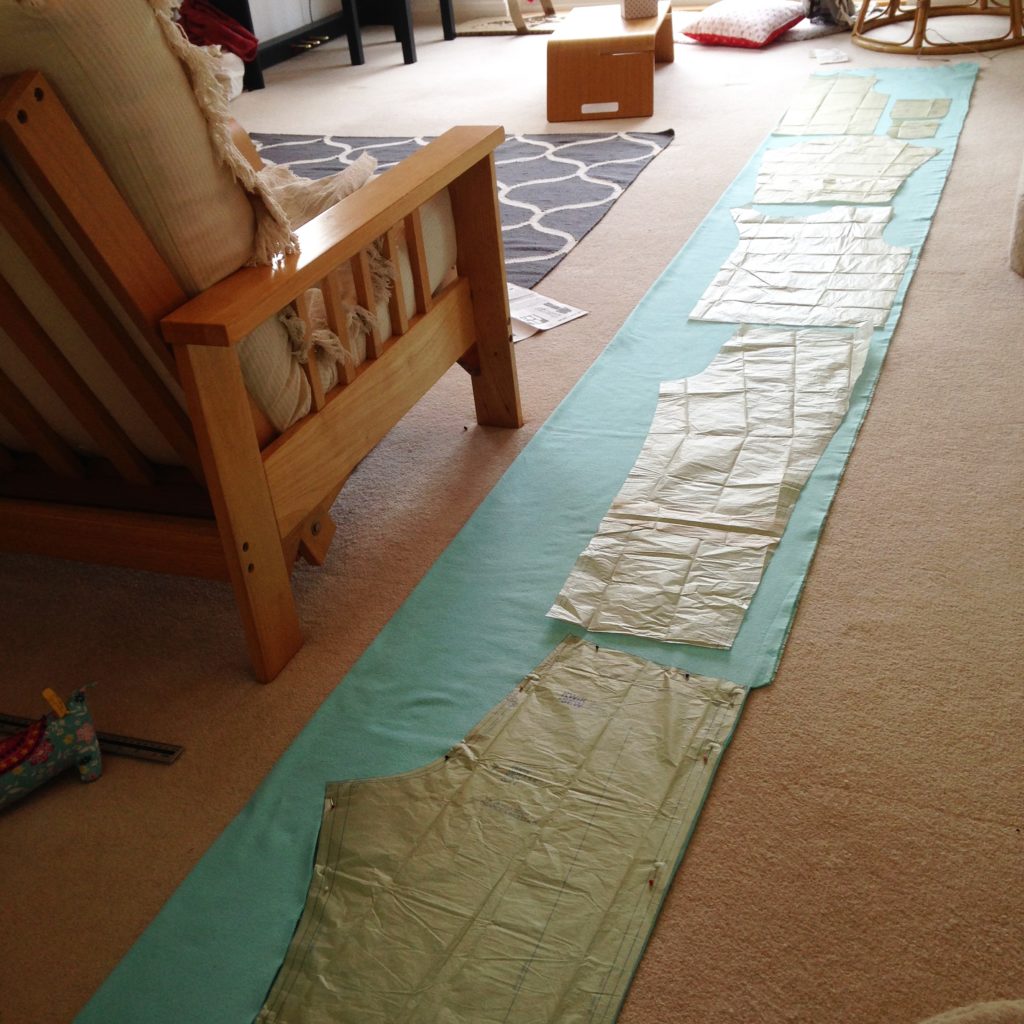
This is a paper only pattern (no PDF version) and I have to say I’m not a great fan of the flimsy tissue that these patterns are printed on. Despite ironing the pieces I still found they refused to lie flat and I always feel like the pieces distort when I pin them on the fabric. Usually I would use pattern weights and my rotary cutter to avoid this but I was working with the full 4.5m of fabric and that certainly didn’t fit on my cutting mat!
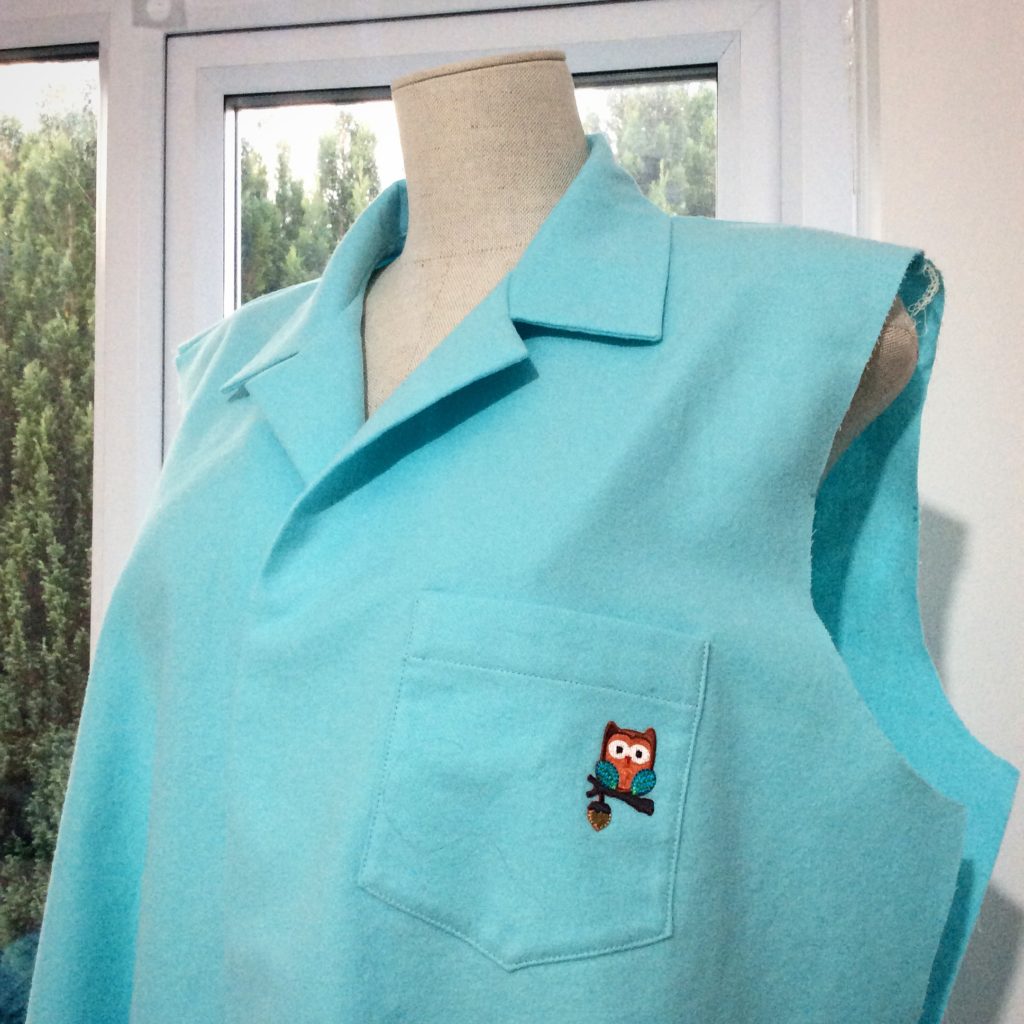
I sewed the pjs switching back and forth between my sewing machine and overlocker. The pattern seam allowance is only 1/4”/6mm which isn’t the standard 5/8”/1.5cm so watch out for that. I chose to use my overlocker to sew the main seams because flannel is incredibly prone to fraying and 6mm isn’t enough room to both sew on the machine and overlock the edges. I sewed the collar on with the sewing machine as the seam is enclosed by the facing and I don’t like cutting notches through overlocked stitches. As usual I used my walking foot to hem. I also upgraded the pocket with this cute owl embroidered patch that I found in my stash:
I had a total ‘mare sewing the automatic button holes on my Janome SMD 2000/525s but apparently many people do! I fiddled around with the settings on my machine but in the end what worked was increasing my stitch length slightly and gently pulling the fabric through the machine – particularly at the top of the buttonhole where the machine needed extra encouragement to begin the second bar-tack. Pro tip: if you’re using a seam ripper to open your buttonholes don’t forget to place a pin at the top and bottom of the hole so you can’t rip too far! I tried to sew the buttons on with the machine too but gave up in the end and sewed them on by hand.
I absolutely love my snuggly flannel pjs and definitely recommend this pattern if you’re looking for a quick and easy sew. The only thing I’d do differently next time is use a lighter interfacing on the collar and facing. I used Vlieseline G700* fusible woven interfacing and it’s pretty stiff. Next time I’d try the lighter G710*. Although I haven’t washed the pjs yet and that might make a difference. Sometimes I feel a little twinge of regret that I chose this pattern over the Simplicity one when I spot beautifully piped fancy pjs on Instagram but mostly I’m just glad I could sew up a complete pj set in just a few relaxed days. Plus, they are super comfy to sleep in and that’s what matters in the end!
*Affiliate links: if you click through and make a purchase I may get a commission (at no additional cost to you). Visit my disclaimer page for more info.