Out of the blue one day my daughter decided she needed a kite, like, right now. So to the trusty interwebs I went and discovered a tutorial on making a diamond kite.
However, failing to have any dowels, large plastic bags or flying line I improvised. So here is my upcycled version of the classic diamond kite!
Tools and Materials Required:
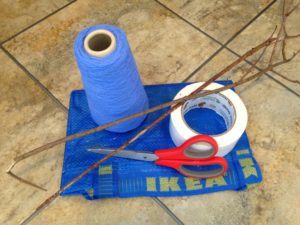
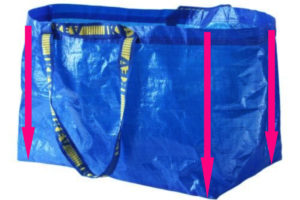
- one blue IKEA Frakta plastic bag
- 2 straightish tree branches roughly 3mm diameter and 20″ long each
- duct/duck tape*
- strong thin acrylic yarn (I got mine from my local scrapstore)
- scissors
- empty toilet roll (optional)
Step 1: Cut out the sail
Open the IKEA bag and make a cut from the top edge down to the bottom in each of the four corners so that you can lay the bag out flat.
Use the flattened bag to cut out a diamond shape 20″ tall and 20″ wide like this:

Note, you will need to include seams from the bag in your kite. After flying ours for a while we learnt that those seams are stitched and cutting unravels the stitching so I recommend reinforcing the top and bottom edges of the seams with tape.
Step 2: Build the frame
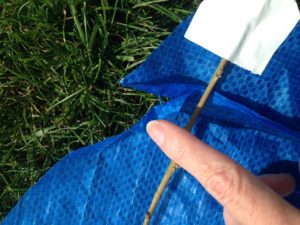
Lay one of your branches down the vertical centre of the diamond, line it up with the top corner and snap it off at the bottom corner. Affix to the plastic bag with duck tape across the top and bottom corners.
Next, lay the second branch horizontally over the first branch running between the other two corners of the diamond. Affix to the corners with duck tape. See the finished kite photo below.
Step 3: Attach the line
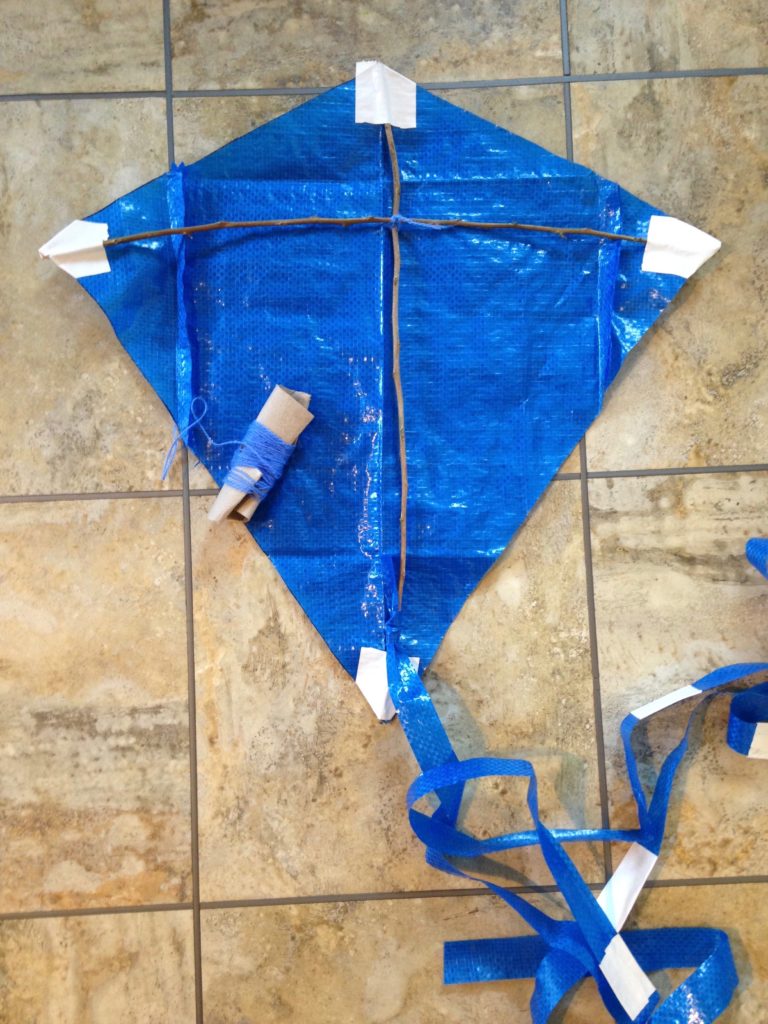
Now for the bit that will sound a little strange if you’ve made kites before. This kite flies with the crossed branches facing AWAY from you towards the sky, not down towards the ground. So poke a hole in the sail right under where the branches cross each other then thread the end of your yarn through this hole and tie it firmly around the crossing-point of the branches (see below). You can leave the other end of the yarn attached to the ball but I like to unwind a good amount (more than you think!) and wrap it around a toilet roll. Just make sure you secure the end so it doesn’t unravel and fly away!
Step 4: Attach the tail
Now for the tail. Cut 1″ strips from the remainder of the bag and duck tape them into a length at least 100″ long or 5x the length of the kite. Thread the end of the tail around the bottom of the vertical branch and tie with a simple knot. You’re done!
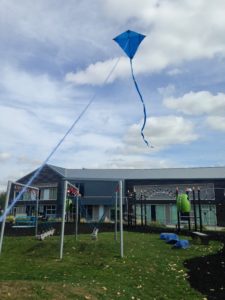
Your kite should now look something like this:

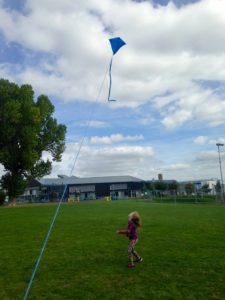
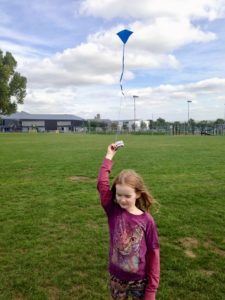
Let me know how your kite flying adventures go in the comments below. We took ours out to the park on a windy day and it was impressive!
*Affiliate links: if you click through and make a purchase I may get a commission (at no additional cost to you). Visit my disclaimer page for more info.